How To Start Your Seeds Indoors
February is the perfect time to start seeds for your garden. Here’s a helpful guide to starting seeds indoors.
Winter gardening sounds like an oxymoron, but there’s quite a bit we can do this month to get a head start on our gardens. Planning your garden is an important part of the process and will reward you in later months. Even if the last frost is still months away, now’s the time to tidy up fruit trees and bushes, check on your soil composition, and figure out what you’d like to plant.
If your ideal garden includes certain kinds of plants that you’d like to grow from seed, February is the perfect time to begin. Here is an overview of the process, as well as materials we will need to successfully start seeds indoors.
What kinds of plants can I start indoors?
Germination is the process of a seed developing into a plant. Some flowers can be started indoors to take full advantage of their spring blooms. Vegetables that have along growing season, or grown for their sprouts, can be started indoors. Some examples are: tomatoes, eggplants, peppers, the onion family, rosemary, lavender, and thyme. Flowering plants like asters and black-eyed susans are also suitable for indoor germination. We carry a selection from Hart’s Seed Co. and Botanical Interests. For our organic gardeners, check the packets for the USDA Organic symbol; both companies have organic options. Make sure to look at what the seed packet says about indoor germination. Some plants need that boost, while others do better sown directly outside and won’t appreciate the early germination.
Once you’ve decided on your seeds, you’ll need more than just a little soil. There are some extra considerations involved when setting up a space indoors. Light, temperature, moisture, and circulation must be accounted for. Good thing you’re planning ahead!
Here’s a list of what you’ll need:
- Seed starting pots: you can grow seedlings in any small container as long as it has good drainage. Compostable pots can go right into the soil when transplanting seedlings, an easy and waste-free solution. The Co-op has many options, like Compostable Trays and Peat Pots. We also have Mini-Greenhouse Kits that include plastic trays and lids.
- Seed starting medium: We carry MiracleGro Seed Starting Potting Mix, Espoma Organic Seed Starting Mix, and Dr. Earth Root Zone Organic Seed Starter. It’s possible to mix your own soilless seed starting mix, as well. The Co-Op sells all the ingredients to make your own batch, such as Vermiculite, Perlite,Coco Coir, Sphagnum Peat Moss, and more. Ask our staff for more information about making your own seed starting mix.
- A spray bottle: we carry a32-oz All Purpose Sprayerwhich is ideal for keeping tender seedlings moist without overwhelming them. Most watering cans are too intense for sprouts.
- Grow light or full-spectrum light source: we carry several different options for light fixtures suitable for indoor growing. We can help you decide what’s the most appropriate for your space.
- Heating mat: There’s the Super Sprouter Seedling Heat Mat, and smaller options if you have limited space.
- Covering material like plastic wrap or clear tray: A Clear Dome Cover helps retain moisture and warmth, speeding up germination. Once the seedlings sprout, you’ll need to remove this for proper airflow.
- Fertilizer: Once your seedlings are more established, a low dose of balanced fertilizer is a good way to keep them healthy if it’s still too cold to plant outside. You don’t want to overfeed them, however. Ask us at the Co-Op for specifics on fertilizing.
Do I really need a grow light and heat mat?
Most rooms in your house don’t have the light levels required for growth from seed. Healthy seedlings need about 14 hours of quality light per day. Your average January day length in New England is about 9 hours. You get the idea.
A grow light ensures consistency, allowing you more control over the whole process and giving you healthier plants. Seeds don’t need to be under light before they’ve sprouted, but once they do, they need those hours of light energy to continue growing. You’ll need a full-spectrum grow light placed directly above the seedlings by a few inches. If your seedlings are a little spindly or seem like they’re stretching towards the light, it’s too far away. You can use a light timer for best results.
In terms of temperature, 65-75 degrees indoors is great for most indoor seedlings since they also tend to be frost-sensitive. If your house is drafty or you’ve got the sprouts next to a window, you may need a heat mat to maintain a consistent temperature for them.
The best way to understand specifics for your plants is to consult the back of the seed packet. If you’ve already invested in seeds and mixes, follow the instructions to grow them up strong.
Why can’t I put my seeds in a potting mix or compost?
Potting mix is fundamentally different from seed starting mix, in composition and nutrition. Seed starting mix holds moisture while being lightweight, and is consistently textured.
A big issue to watch out for when starting seeds is a lack of circulation and too much moisture, which can lead to mold and rotting seedlings. Potting mix will be too dense for the seeds and prevent them from getting airflow. The chunky consistency of potting mix can also hinder root development.
The medium you put your seeds in must allow for airflow and the right amount of moisture retention. If you water them appropriately and let the seedlings breathe, they’ll flourish.
How do I properly plant my seeds?
Whatever type of mix you use, whether you bought it or made it yourself, should be thoroughly moist before putting in the pots. You can put it in a bucket and gradually add water until the medium has absorbed as much as it can without being soggy or muddy. You should be able to squeeze some drops of water out.
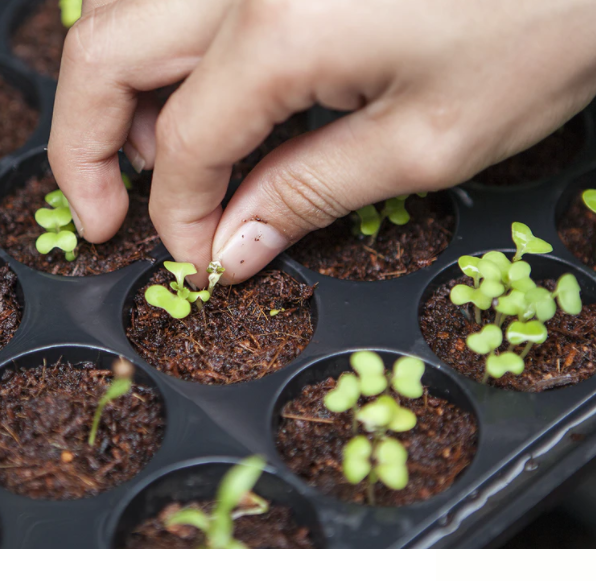
Most indoor-germinating seeds are quite small and delicate. Consult the seed packet for the correct depth to plant them at. You can also double or triple up on the seeds in each compartment and thin them out later.
When watering your plants, use the spray bottle or put water in the tray holding the pots so you don’t disturb the seeds. Don’t let the seeds dry out, but don’t swamp them, either. This is when the plastic cover comes in handy, preventing the water from evaporating too quickly. If you see any mold, scoop it out and let the medium breathe and dry out a little bit.
When do I fertilize?
When the seedlings have grown some sets of real leaves past the first oval-shaped ones that emerge, you can start to apply a small amount of diluted, balanced fertilizer like 10-10-10. Only a quarter strength fertilizer is required for plants this young. It’s also not essential at this stage unless you’re hardening them off, another important step we’ll cover in the next section. You can always consult us at the Co-Op for best practices.
When can my seedlings go in the garden?
Once all danger of frost has passed, you can start preparing to transplant your seedlings into their new homes outside. Hardening off your seedlings is essential to their continued health in your garden. Going from a climate-controlled environment to the outdoors leaves your seedlings susceptible to sunburn and shock. You must acclimate them by setting the seedlings in a shady, sheltered area for an hour or so, increasing their time outside a little each day. Nights are still going to be quite cold, so don’t leave them out overnight. After at least 10 days of this, they’ll be ready for transplant.
Suffice it to say, you don’t want to see those seedlings you’ve cultivated with care freeze with a surprise cold snap in April. The climate in New England can be unpredictable, and a rocky start to spring means you’ll need to keep your seeds inside until we’re safely past the last frost day. On average, this is late April in our region, but it varies year by year. Of course, use your common sense and the weather forecast to make the best decision.
Once your seedlings are acclimated to the outdoors, pick a nice cloudy day to transplant them into their new environments. Step back and feel accomplished at your handiwork!

Further Reading:
High Mowing Seeds - An Indoor Seed Starting Guide For The Home Gardener
High Mowing Seeds - Best Practices for Early Season Seedling Propagation
Botanical Interests Seed Company: How-to articles on seed starting
Coast Of Maine Soil Company Blog - Seeds Are Not Just For The Birds